
Escape Mail season 1: episode 11 HINTS


*For those of you playing “Hard” be warned, this is one of the hardest episodes yet. Before looking at the clues, you may want to view the flow card to assist you.
**If you think you are experiencing technical difficulties with the online portion (no sound, screen partially cut off) it could be an issue with an old version of iOS. Please try using a newer version of iOS or Android. If technical issues persist, please let us know. Also, we always recommend the experience on Chrome.
Find Svetlana’s Location
Nudge↓
JJ’s always in a rush and he can be a bit flurried,
but you’re rock solid Cuz, you do not need to be worried.
JJ noticed the page numbers seemed a bit strange.
Surely, they must need to be rearranged.
Are you more into words? Noticing letters?
Two ways to solve, neither one is better.
Small Hint↓
Where to start in a book so complex!
Svetlana will tell you hidden in the text.
There is a phrase that - once found - is clear:
twice Svetlana has written, “start” here.
Medium Hint↓
Svetlana has told you to start with Fibonacci
Count the spiral squares rather carefully
One, one, two, three, five, eight and on,
Numbers you’ve seen... but connection drawn?
Big Hint↓
Now you notice the Fibonacci Sequence,
corresponds to pages without reason.
Give those pages rearranged order,
And notice a number written in each corner.
Solution↓
The puzzler is trying to find encrypted GPS coordinates to enter into the GPS decoder that JJ sent. In total it is four sets of 4-digit numbers (16 numbers total).
There are two possible ways to solve this puzzle.
Option 1: In JJ’s intro letter he mentions that the page numbers appear to be out of order and that they must need to be rearranged. Also, on page 377, Svetlana alludes to the Ep4 passport that was "disassembled". Furthermore, Svetlana reveals on page 233 - in two different places - that the Fibonacci Sequence is a good place to “start”. This draws the puzzler’s attention to the Fibonacci Spiral on page 21. Since the puzzler knows the two single squares represent “1” then the square beneath must represent “2”. Given the instructions Svetlana wrote in the bottom half of page 233 on how the Fibonacci Sequence is calculated, the sequence can be discovered: 1+1 = 2, 1+2 = 3, 2+3 = 5 etc. (for further explanation on the Fibonacci Sequence click here.
Now, noticing that Fibonacci’s numbers appear (in mixed up order) at the bottom-middle of each page from 1 (which occurs twice) to 987, the puzzler can then disassemble and rearrange the pages of the book in order (1, 1, 2, 3, 5, 8, 13, 21, 34, 55, 89, 144, 233, 377, 610, 987). When the pages are laid out on a flat surface,the puzzler can observe the “digital” style numbers at the bottom corner of each page (similar in appearance to those of the required GPS coordinates). The first 8 digits are now apparent (3249) and (0530), and notice the letters at the tops of each page spell out “FIBONACCI”. The remaining digits can be deduced by flipping each spread to continue the mathematical sequence (which also spells “SEQUENCE” at the top of the newly assembled pages). This will reveal the remaining 8 digits of the GPS code: (8271) and (9660). When entered into the GPS decoder from top to bottom, JJ’s device points him to a currently-uncharted desert island in the Pacific Ocean.
Option 2: More into words? You might have also noticed that there are letters at the top of each page. If you deduce from Svetlana's clues that the Fibonacci Sequence is a good place to start, then you might arrange the pages according to the letters that spell out "FIBONACCI" on one side and "SEQUENCE" on the other.
Approach camp
Nudge↓
JJ sees a tent ahead,
but rather than being rash - instead
notices some sensors there
and says to Cuz, “I’ll go, but where?”
Your job is to tell him how to avoid harm
to approach camp without sounding an alarm
Small Hint↓
Each sensor has a radius indicated,
these are here to keep her camp gated.
Note the lower right - 2 sensors clued,
circles are already drawn to assist you.
Medium Hint↓
Now you know where sensors lay,
but JJ still needs to find his way.
JJ says to use north as a guide,
Svetlana has drawn “N’ on the left side.
Connect the north arrow to the tent,
to give your protractor the right placement.
Big Hint↓
Now you have the north baseline drawn
place your protractor the tent there on.
You’ve drawn the radius of each sensor,
now find the one line from the perimeter.
Clockwise from north how many degrees,
send that number to JJ to put him at ease.
Solution↓
This puzzle has three main steps:
Step 1 Note that JJ is outside the perimeter and does not know the coverage of each ground sensor. Svetlana has left herself a clue on the lower right corner of page 987 to indicate that the symbols placed sporadically around the tent represent numbers that are an indication of radius. Fun fact, this is the same Hunter numbering system from Episode 7. You don't need to remember that fact to solve the logic of each symbol's meaning and each circle size, but it is a fun tidbit. Now, draw a circle with the correct radius around each symbol, using the two example circles as a guide. See what that looks like here.
Step 2 You’ll note that this blocks off all straight passages from the perimeter through to the tent with the exception of one line. Draw a straight line where you see the opening from the perimeter to the tent. Click [here] for an example. How to communicate this path to JJ?
![[here]](/s/Campsite-3.jpg)
Step 3 JJ says to use “North” as the reference point. So, draw a straight line from the “N” arrow indicated on the left side of the diagram to the tent. This is your baseline. Cut out and place your protractor with the tent at the centre of your protractor (see example here). Now measure the angle (in degrees) clockwise from North to the approach line. The correct answer is 295 degrees (since the provided protractor only goes up to 180 you must extend the base north line past the tent OR measure the shorter angle and subtract from 360). If JJ follows your advice of 295 degrees (due to the nature of the puzzle a 5 degrees plus or minus will work as correct answers too) he successfully enters camp without tripping an alarm.
Deactivate Sensors
Small Hint↓
Now that camp has been accessed,
JJ must ensure he doesn’t make a mess.
If he stumbles into Svetlana’s sensor,
you can be sure that would incense her.
So, help JJ to deactivate
solve Langton’s Ant before it’s too late.
Medium Hint↓
This math is real world! A phenomenon,
the formulas could in theory go on and on.
But Svetlana - a three by five grid she’s drawn,
with every block turned off not on.
Hold each step’s form; it’s NOT forgone!
Follow instructions and arrive upon
a 6-digit answer, then JJ can be gone.
Big Hint↓
Note the number next to each arrow,
that tells you the order in which you should go.
Note the letter beside each number,
that’s the function - miss that and blunder!
And one more fact that's been concealed:
circle means stop! A digit’s been revealed.
Solution↓
This puzzle is difficult to explain in writing, so here is a diagram.
Find Computer Password
Small Hint↓
They say that pride goes before the fall;
“A pretty big deal” is her be all and end all.
She connects a story from 1873,
to the kind of place she’d like to be.
Big Hint↓
Svetlana let us know about keyboard keys,
and drew a funky tower with clouds and trees -
most notably some windows open in the breeze -
see how the panes are split in ones, twos, and threes?
Solution↓
Svetlana left a clue on page 89 about the format of a keyboard in QWERTY layout. She connected this idea to the picture of the tower on page 3 through the recurring phrase “pretty big deal” as well a direct refernce to "QWERTY". Therefore the puzzler is inclined to notice the tower - when turned sideways - resembling that of a keyboard (this is also hinted at in JJ’s photo of the locked screen which only includes the letters QWERTY in the shot). There are several windows on the tower drawing with features in them, and these features correspond to keys on the keyboard: ASECTL which can either be anagrammed into a word or solved using the following logic: each window has a number of lines in it to create partitions and blinds/curtains - the number of lines (1-6) reveals the order of the keys until the word CASTLE is spelled.
Answer security questions
Small Hint↓
At the start of this adventure, you may have felt
like Svetlana was rambling on about herself,
but of course the skill of a mastermind
means nothing is ever wasted or left behind.
Big Hint↓
Note how Svetlana tells us a story
of when she was learning the art of burglary.
She leaves behind certain special facts
about a car’s colour and the name of a cat.
Solution↓
Page 144 details an event from Svetlana’s childhood when she was “learning to drive” and she subsequently notes her parents’ “red” car, so it stands to reason that she learned to drive a red car. Svetlana is also being observed by some “entity” named Fluffers which we can safely assume is not a sibling (chuckle) but a pet of some kind.
Re-orient satellite dish
Small Hint↓
This far-reaching puzzle, although only second-to-last,
may prove to be a challenge unless you’ve played fair in the past.
In case you lack experience in this kind of game,
Svetlana has - on page 5 - done her best to explain,
how the grid is made and how the grid is filled.
You have everything you need - keyphrase lacking still.
Medium Hint↓
Once you understand page 5 in the book,
flip over to page 13, solve and take a closer look.
Crosswords that cross words... filled with clues,
once solved tell you directly what to do.
Knowing Svetlana, you should read them askew!
Big Hint↓
Now you know about the heat, and the reprogramming key.
Fill the grid so you can understand the coded pairs completely.
Solution↓
Step 1: Notice the instructions on page 5 of how to encode a secret phrase. The example depicts a keyphrase: “MY NAME IS SVETLANA” which enables Svetlana to create a 5x5 cypher grid using the letters from her keyphrase (only once) and each unused letter of the alphabet following after (excluding Z). This serves as an example of how you will solve the real puzzle.
Step 2: Now you know you need to collect two sets of information to deduce the answer to the new code that she has created: the new cypher-grid setup and the new scrambled code. Steps 3 and 4 can be done in any order.
Step 3: Page 13 describes how "these modified crosswords" help with the satellite. You also see 4 blanks and 5 blanks with "the" between. After solving the crosswords (see solved crosswords here), you may notice a classic Svetlana trick (from Ep10) where the diagonals reveal instructions for what to do next: heat the check. These boxes are also bolded to help indicate that you need to find the words on the diagonal. Also note, the check has “satellite” written on it in the memo, connecting the aspects of the puzzle. If you heat the back of the check (cheque for Canadian/British spelling) you see the blue box fade and the words appear “reprogramming key: EMERGENCY PROTOCOL”. (Insert gasp here). Not only is this a nod to Episode 2’s intro letter which was titled the same, but it more importantly is the keyphrase for the cypher that Svetlana has developed (see her instructions on page 55 where she mentions needing a reprogramming key). So, now that you have the letters EMRGNCYPOTL from the back of the check, start filling in the 5x5 grid (as depicted here) and fill the remaining squares with the unused letters of the alphabet, in order, excluding Z (as depicted here).
Step 4: The encoded phrase can be found by observing page 34 and page 8 and the letter pairs from the concentric satellite rings and order the letter pairs starting with the inner ring and moving outward (as the mechanical iris description on page 8 suggests). The code is NO EH KA XU VX XN GJ AG XS IV HT.
Step 5: Using the newly created cypher grid (keyphrase “EMERGENCY PROTOCOL”) and the newly discovered encoded phrase NO EH KA XU VX XN GJ AG XS IV HT and mirror each letter on the grid to get SIXTYDEGREESUPDUENORTH and tell JJ that the angle to point the satellite is 60 degrees up due north. To see an example of how to find the mirror opposite, see this image of "N" mirroring to "S".
open svetlana’s case
Nudge↓
Escape Mail players from every country
everyone uses a different currency.
Even English speaking countries cannot agree!
Different ways to spell “check/cheque” - both money!
Small Hint↓
Every country’s cheque format is somewhat complicated.
Burgland’s digits are explained at the bottom - abbreviated.
You’ve seen these words before though separated.
Medium Hint↓
JJ sent you words, but in the notebook they are images.
Now identify the word that each icon touches.
Big Hint↓
JJ’s list of words is a helpful little text:
His words translate to pictures, touching words found on a check,
See corresponding numbers; now, envelope is next.
Follow the envelope's instruction to have the right effect.
Solution↓
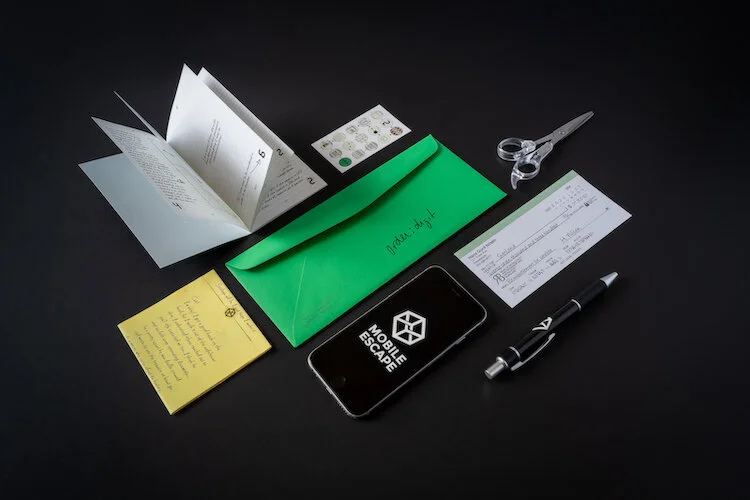
JJ texts you a list of words that he finds on the computer with numbers separated by a colon: Credit Card 3:9, Medallion 6:2, Glasses 4:2, Tent 1:5, Capital 7:4, Parcel 5:6, Bike 2:6. This makes the puzzler think of two things: First, the words in the list are drawn sporadically throughout the sketchbook. They also happen to appear suspiciously near (touching) certain words at the end of a line. The image of the Credit Card is next to the word “phone”, Medallion next to “institution”, Glasses next to “address”, Tent next to “account”, Capital next to “transit”, Parcel next to “amount” and, Bike next to “date”. Each of these words represents an aspect of the cheque.
Secondly, the format of the two numbers separated by a colon appears also on the envelope where the words “order:digit” infer that the first number indicates the order and the second number the digit in your final code. So you now know which number to select first and which digit from within that number is the one you need.
For example: "Tent 1:5" Step 1 - Find the image of the tent drawn in the notebook. What word is it touching? "Account". Step 2 - According to the envelope, the first number before the colon indicates order, so Account (6789113) comes first in the sequence. Step 3 - According to the envelope, the second number indicates Which digit to select, so from 6789113 you select 1.
Continue this logic. Glasses 4:2 means the 2nd digit from the Address (127) on the check goes 4th in solution. This results in a final code of 1072884.
Do you have feedback for escape mail?
We would love to hear your thoughts: